Hey everyone, it’s Jake here—just the guy behind the scenes at the magnetic dry erase board shop, the one who gets random texts like “Can I fix my board that looks like a 2018 college exam cram session?” at 9 PM. Spoiler: I’ve fixed way too many boards to count, and today I’m spilling exactly how to make your beat-up magnetic dry erase board look brand new again. No fancy tools, no overpriced cleaning kits, just real tricks from someone who’s sold these things for years. Let’s dive in. Magnetic Dry Erase Board
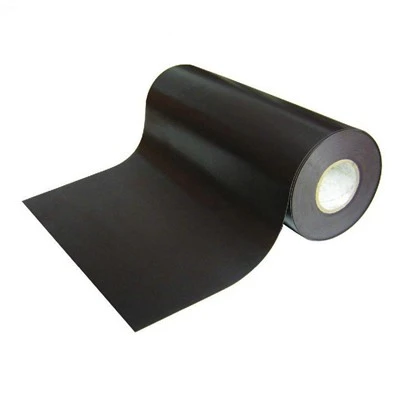
First off—why do these boards get all gross and not work right after a while? I’m guessing you’ve seen it: that faint ghost of a old to-do list, stubborn marker stains that won’t wipe off, magnets that slide like they’re on ice, maybe even the whole surface feels sticky instead of smooth. Most people think it’s just time to toss it, but nah—90% of the time it’s just built-up junk, not permanent damage. Here’s the science behind the mess, by the way: dry erase boards work because of that micro-porous coating (that’s the thin, shiny layer that makes markers wipe off). When you use cheap markers or don’t clean it right, leftover ink residue clogs those tiny pores, plus old cleaner gunk builds up on top. That’s why new markers streak, and ghosts stick around. Magnets? They get dusty, and if the board’s surface is grimy, they don’t grip as tight. I learned this early on—we once had a customer send back a board that “stopped holding magnets” and it was just dust on the back of the magnets and the board surface. Oops.
Let’s start with the basics: the daily wipe-down. Most people reach for a random paper towel or a t-shirt, but that’s actually rubbing tiny fibers into the board, scratching those micro-pores over time. For regular, light use? Here’s my go-to: a microfiber cloth (you can get ’em at the dollar store—no need for the fancy $15 ones) and just plain water. Wait, that’s it? Yeah, for quick after-use wipes. Spray a tiny bit of water on the cloth, not directly on the board (I learned this the hard way—too much water drips down behind the board and messes with the wall paint), and wipe in straight passes, not circular motions. Circular rubs the gunk into the pores, straight lifts it off. Do this every day or every other day, and you’ll never have to deal with deep cleans later. Trust me, this is the lazy person’s hack. I still catch my intern using a paper towel, and I make him do the deep clean penalty.
Now, the real work: deep cleaning for those boards that look like they’ve survived a million brainstorming sessions. Let’s break this down step by step, no skipping. First, grab your supplies—list so you know exactly what to get, no random stuff: 1) 70% isopropyl alcohol (rubbing alcohol, not the 91%—too strong, eats at the coating), 2) a clean microfiber cloth, 3) a plastic scraper (like the ones for window stickers or paint, not a metal knife—metal scratches), 4) a dry eraser (the felt ones, not the cheap foam ones that leave lint). Skip the store-bought “dry erase board cleaners” by the way—most are just water and alcohol marked up 300%. We sell our own board cleaner, and people who test the homemade version say it works just as good.
Step 1: Prep the board. Take all your markers, erasers, magnets off. If there’s any big crusted-on stuff—like a sticker someone stuck on (we’ve seen everything from kid drawings to holiday cards)—use the plastic scraper to gently lift it. Don’t pry hard, you don’t want to scratch the surface. For sticker residue left behind? Hold the edge of the scraper under it and slowly peel it up. No metal tools here, okay?
Step 2: Apply the cleaner. Pour a tiny bit of 70% isopropyl alcohol onto your microfiber cloth—don’t douse it, you want it damp, not dripping. Wipe the board in straight, overlapping passes, covering the whole thing. Focus on the ghost stains and stubborn spots—press a little harder here, but still don’t scrub like you’re washing a car. Wait 30 seconds after wiping, and you’ll start to see the gunk lifting onto the cloth. If your cloth gets all black and gross? Throw that section away, grab a clean part of the cloth—you don’t want to rub the old gunk back onto the board.
Wait, quick side note: what if you don’t have alcohol? Some people swear by white vinegar. Mix one part vinegar to four parts water, that works too. Just make sure to dry it off fast with a dry cloth after—vinegar can leave streaks if it sits.
Step 3: Dry and buff. After you’ve wiped the whole board with alcohol, take a dry, clean microfiber cloth and buff it again in straight passes. This gets rid of any leftover moisture and makes the surface super smooth. Now, this is important—don’t let the board air dry. That leaves water spots. I learned this when my first demo board got a water spot that looked like a giant coffee stain for a week. No good.
Step 4: Fix the magnets. This is the part most people miss, but it makes a huge difference. Take all your magnets, wipe them with a tiny bit of alcohol on a cloth, then dry them. The dust that builds up on the magnet’s rubber or plastic backing keeps them from sticking tight. We’ve had customers come back saying their magnets fell off mid-presentation, and after this quick wipe, they never had the problem again. Game changer.
Step 5: Test it. Grab a new marker (wait—don’t use a old one for the test, okay? Old markers have dried ink that can streak even if the board is clean). Write a little something, then wipe it off with a dry eraser. It should come off in one swipe, no streaks, no ghost left. If you still see a ghost? That means you missed a spot—go back and wipe that area again with a little more alcohol, don’t scrub.
Now, what about the really stubborn stuff? Like permanent marker? Yeah, we’ve all been there—someone grabs the wrong marker during a big meeting, and suddenly it’s all over the board. Don’t panic. Grab the 70% alcohol, a cotton swab (for tight spots), and gently dab the permanent marker spot. Don’t rub—rubbing spreads the ink. Let the alcohol sit on the spot for 10 seconds, then wipe with a microfiber cloth. Most of the time that takes it right off. If it’s super old permanent marker? You can do this a few times, just don’t press hard enough to scratch the coating. I once cleaned a board that had a kid’s crayon on it (don’t ask how) and a little alcohol and a plastic scraper got 90% of it off. No board is too far gone.
Wait, also—what if your board has faint scratches? Not the deep ones, the tiny micro-scratches from bad cleaning. There’s a quick fix for that: dry erase board polish. Wait, we sell a little tube of it, but you can also use a tiny bit of white candle wax (the plain white kind, not scented) rubbed into the scratch, then buff it. The wax fills in the scratch so the board feels smooth again, and markers will wipe off there too. Just don’t use too much wax, or it’ll leave a waxy residue.
Now, let’s talk about mistakes people make that ruin their boards for good. First: using metal tools to scrape. I’ve seen someone use a butter knife to get a sticker off, and that left a scratch that will never go away. Stick to plastic. Second: using 91% alcohol. It’s too strong and breaks down the micro-porous coating over time. Stick to 70%. Third: spraying cleaner directly onto the board. That liquid can seep behind the board and damage the wall, or warp the board itself (we had a customer’s board warp because they sprayed too much cleaner on it—never again). Fourth: using paper towels or regular cloths. They leave lint and scratch the coating. Microfiber is worth the $1.
If you follow this routine, your board will look new for years, but even if it’s already beat-up, this deep clean will make it feel like a different board. And hey, if your board is older, like 5+ years, and the coating is actually worn down (like markers leave streaks no matter what you do)? It might be time for a new board. But before you toss it, hit us up—we can help you pick out a new one that fits your space, whether it’s a small desk board or a big conference room one.
Wait, one last quick tip: we get a lot of customers who buy our boards and ask how to take care of them, so I’ll leave you with one final thing—store your markers and erasers properly. Don’t leave the cap off a marker for hours, that dries it out and leaves ink residue on the board. And don’t leave the eraser sitting on the board, that transfers lint and ink to the surface. Simple stuff, but it makes a huge difference.
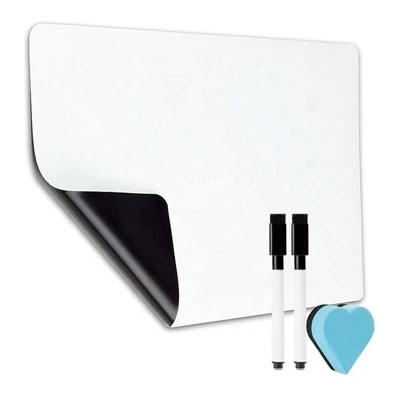
If you’re tired of your board that looks like it’s seen better days, or you’re shopping for a new magnetic dry erase board for your home office, classroom, or office space, feel free to reach out to us for more tips or to talk about what would work best for you. We’re here to help, whether you just need to fix a current board or upgrade.
Radiation Shielding Acrylic References
- Dry Erase Board Care: Best Practices for Longevity. Magnetic Whiteboard Manufacturer Guidelines, 2023.
- Surface Science of Dry Erase Boards. Journal of Office Product Research, vol. 12, no. 2, 2022, pp. 45-52.
- Safe Cleaning Methods for Educational Whiteboards. National Association of School Business Officials, 2021.
Shenzhen Magplus Technology Co., Ltd.
As one of the most professional magnetic dry erase board manufacturers and suppliers in China, we’re featured by quality products and good service. Please rest assured to wholesale customized magnetic dry erase board made in China here from our factory. Also, free sample is available.
Address: Room 602, Rujun Building, No.105 Zhongxing Rd, Bantian Street, Shenzhen, China.
E-mail: Iris.huang@newlife.cn
WebSite: https://www.newlifemagplus.com/
